Tuesday, June 15, 2010

Wipes Set Giveaway Winner!!

Thanks to everyone that entered the cloth wipes set giveaway! The winner is.....

Tiffany!!!!

Tiffany said "I love the wild animals wipes. We would use them instead of disposable wipes! So cute."

Thanks to Random.org for picking the winner!!

Tiffany, I will be sending you an email for your shipping information from taranicoledesigns@hotmail.com.

Monday, June 7, 2010

Giveaway!! **Updated**

My little man is turning 1 this week!!! I just cannot believe how big he is getting – I swear he grew at least another inch last night!! There were so many firsts this year, for all of us. First time parents, my first time not having a job outside the home, first serious injury (thank God that one’s over with!!), and I’m surprised I have not had my first gray hair yet!

So, since I will be getting everything ready for his 1st birthday party, I will be taking a little hiatus from blogging this week. But….I will be leaving you with something….

A GIVEAWAY!!!!

I will be opening my shop back up at the end of this month after a major overhaul and one of the new items I will be carrying will be these super cute, super soft cloth wipes. (Lovingly called ‘Ucky Wipes’.)

These 8” x 8” wipes feature adorably soft flannel on both sides and come in a variety of patterns. Ucky Wipes are extremely versatile and can be used to clean up many ‘uckies’. Use them on your baby’s bum as a gentle alternative to disposable wipes. Use them as face wipes to clean off the meal time uckies. Use them as tissues for those runny nose uckies (What kid wants to use those ugly, scratchy kleenexes anyway?). Fold these wipes in half and they fit perfectly in most disposable wipes containers.

Today’s giveaway is for a set of 4 Ucky Wipes in your choice of patterns!!

***UPDATED*** I will also be giving the lucky winner a customized travel wipes case to match their choice of wipes!!!


Browns & Blues


Wild Animals


Polka Dots


Little Ones


How to Enter: (You will be entered for each task you complete.)

1) (You must complete this first task to be entered.) Leave a comment on this post telling me what pattern set is your favorite and what you would use these wipes for.

2) Become a fan of Tara Nicole Designs on Facebook.

3) Write on your Facebook wall or blog telling about this giveaway. Leave a link to your post either on the fan page or on this post.

The drawing will be open until next Monday, June 14th at 12:00pm central time and I will announce the winner on Tuesday, June 15th. Good Luck!!!!


Wednesday, June 2, 2010

Thrifty Thursday: Deal A Day Sites

Geez...I picked a heck of a week to overhaul my blog! I won't be around the computer for a couple days so this is going to be a pretty stingy post for Thrifty Thursday. I promise Friday's post will be better, but don't plan on seeing it until at least Friday afternoon! :)

For this week, I just want to share some of my favorite deal a day sites with you.

My absolute favorites are the steals network sites:


These sites have the all-time best customer service!!! When your chatting with them on facebook, it feels like your talking with old friends. They definitely know how to run their business!!

Some more deal sites for kids and babies are:

     Good selection of products. I don't feel like they just keep rotating the same old stuff all the time.
     I haven't purchased anything from here for awhile. The customer service is good but they don't have big    variety of products and their shipping costs can be kind of high at times.

A couple others that I haven't purchased anything from yet are Ecobabybuys.com and Babyhalfoff.com

Deal sites for scrapbooking and crafts:


I really love Target's Daily Deals! I've bought many things from there at really good prices and their daily deals all have free shipping!!

Just remember that it is really easy to get caught up in the daily deals. One of the biggest marketing tactics of some of these sites is to make you feel like you need this product right now because it's at a great price and if you wait, you'll miss it. When in reality, you can sometimes find it at a better price on a different site. I almost always google the product before I buy it. I've also realized that it's worth a couple more dollars to buy from a company that I like and that treats their customers good. If a couple deals sites have the same product, I will always buy from the company with the better customer service.

Cloth Beginnings

When I first became pregnant, I never once imagined I’d be using cloth diapers. Put my baby in pieces of leaky cloth with pins and rubber pants? Are you kidding me?!? No thank you!

Of course, like any first time mom, I did my research on the best disposable diapers and I was a little concerned with some of the instructions and warnings – if you see pieces of gel on your baby, just wipe it off. Hmmm, is that really safe? What exactly is that gel made of?? Still, that had to be better then wounding my precious baby with those diaper pins!

I became slightly curious about cloth diapers when my son was around six months old. Due to a health issue with my son, I was now a stay at home mom and we were looking for ways to save money. Little man had also outgrown the Pampers Swaddlers by now and he had started getting rashes that we assumed were from his new diapers.

Fast forward four months later, after numerous diaper rashes, leaks, blow outs, and many brand switches, we decided to take the plunge into cloth. During all my research, I found out that cloth diapers had changed so much from the diapers our grandmothers used. No more pins and rubber pants with the same old dreary colors. In fact, there were so many choices that I was completely overwhelmed! There were All-in-ones (AIOs), pocket diapers, hybrids, fitteds, pre-folds, flats, covers…Ugh!! I had no idea where to even start! Through a friend (the one person I knew in the whole state that was using cloth!) and some ladies on the Babycenter.com Cloth Diapering Board, I found out that some stores offer trial packages of cloth diapers. This is perfect for an overwhelmed newbie! You get to try out different types of diapers, keep the ones you like, and send back the ones that don’t work for you. I decided on a trial pack from Jillian’s Drawers. (You can learn more about that here.)

We ended up keeping the whole trial package plus we bought some more diapers to set up our stash. We now have:

4 Grobaby shells + 8 inserts, 2 soakers, and 50 disposable biosoakers

1 BumGenius! 3.0 AIO

2 FuzziBunz Perfect Size Pocket Diapers

1 Thirsties Duo Pocket

1 Rumparooz Pocket

1 Bum Genius! Pocket Diaper

2 Blueberry Pocket Diapers

1 Ecobumz Supreme Stuffable AIO (2 more on the way)

1 DreamEze Organic AIO

1 Baby Beehinds Fitted

2 Bumboo Fitteds

1 Thristies Fab Fitted

4 Prefolds

4 Diaper Covers

20 Gerber Prefolds to use as extra inserts and soakers

Considering my addictive personality and ADD tendencies, it’s no surprise that I couldn’t decide on just one type or brand of diaper!! My favorite dipes so far are the Rumparooz and Ecobumz. I also use the prefolds more than I thought I would and the Grobaby Diapers a lot less than I thought I would. The diapers with the velcro are easiest to put on our little man, but the diapers with the snaps are easier to wash and stay on better. The pocket diapers with extra soakers or the fitted diapers and covers have worked best for nighttime diapers. My hubby’s favorites are any of the diapers with Velcro and I make sure that there are AIOs or Pocket Diapers always stuffed and ready for him.

All in all, we have enough for at least 26 diaper changes with 2 more diapers on the way. Plus, I ordered some fabric so I can start sewing some diapers. I am washing about every other day right now and I’d like to have enough diapers so I only need to wash every third day. When I wash the diapers, I use a cold rinse/hot wash/cold rinse cycle. I dry the inserts and soakers in the dryer and line dry the diapers. I bought some flannel fat quarters on sale and made them into 8”x 8” wipes by sewing two pieces together. I bought an adorable hedgehog print wetbag from Monkey Foot Designs and I am just using a $4 nylon laundry bag from Target for a pail liner. I did splurge and get a diaper sprayer for some of the messier diapers.

Of course, it wasn’t smooth sailing right away. We had quite a few leaks the first couple days due to user error and/or the diapers not being completely prepped. We had one big leak at church and I had to strategically hold little man and his blanket so people couldn’t see the wet spot in my lap! After a few days, we had it pretty well figured out and we may have a leak now and then, but we still had more leaks (and rashes and blowouts) with disposables.

Something that really surprised me about the switch to cloth was that little man started sleeping better. He was taking longer naps and sleeping better at night! We all know that a well rested baby makes for a well rested Mommy and that makes everyone happy! : )

Tuesday, June 1, 2010

Tuesday's Tutorial - Barn Window Message Center

Living on an old farm, I always have a great variety of old materials that I can use for crafting.


I found a whole stack of these windows just sitting in one of our old farm buildings a couple years ago. I dug them out, cleaned them up and I was planning on making some sort of cold frame or small green house with them. Turns out, old and extremely weathered windows don’t hold up to any sort of construction very well. I set them aside and moved on to my next projects, figuring that I’d find a use for them sooner or later…


I’ve wanted some sort of message center for our kitchen for awhile now and it hit me that this would be a great way to repurpose these windows. Because I still wanted to hold on to the weathered and distressed look of the windows, I didn’t bother using primer. By skipping that step, the paint really soaked into the wood showing off the grain and cracks. I used a bluish teal color for my base and then a thin coat of white on top. I finished it off by sanding the edges and adding a couple coats of polyurethane.

I used some fabric covered cork to replace the window panes. I just cut an old corkboard to the sizes I needed and then used some spray adhesive to attach the fabric to the cork. I used my hot glue gun to fasten the panels to the window.

I painted a hanging basket for our mail and used a couple thumbtacks to hold it on one of the panels.


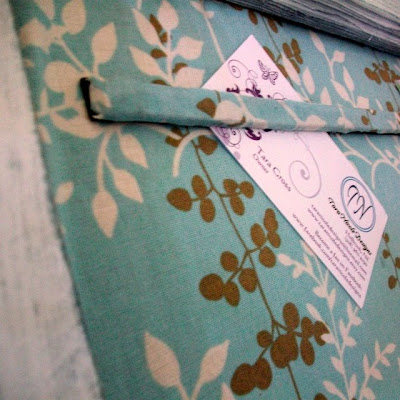
On another panel I used my glue gun again to attach a magnet strip. Then I glued some fabric on one side of another magnet and we use this to hang small items like business cards.


I used some little screw-in hooks on the sides to hold keys and some bigger hooks and a dowel on the bottom for a towel rack and apron hanger.


I think it turned out pretty good! Even hubby likes it! I love the distressed look of the wood and the fabric is the perfect color. The only thing I might have changed would be to make a chalkboard panel using a thin piece of plywood or panel and chalkboard paint. There’s always next time. :)


The Girl Creative
All Thingz Related


NightOwlCrafting


Monday, May 31, 2010

Menu Monday: 6/1 - 6/7

I know I said I was going to start my healthy weekly menus today…but that was until I decided to clean out my pantry. After throwing away some things that expired in the beginning of 2009 and seeing multiple open containers of the same thing, I decided that it might be time for a pantry cleanout.

I’m challenging you, and myself, to cook this week’s meals using ingredients from your pantry. If you’re like me and stockpile when you see a good deal, you should have plenty to eat. : ) The only things I’ll be buying at the grocery store this week will be milk and salad veggies like lettuce and tomatoes.

Here are some great links for pantry meal planning…


Monday, May 17, 2010

Googly Eyes


This might not be the most intricate page I have done, but it's definitely the most fun I've had after finishing a page! It's all because of the googly eyes! I made them out of some baby food jar lids and packaging from some scrapbook embellishments. The button 'pupils' move around whenever the page is moved and I seriously can't stop shaking the page!!

Of course I want to share all the fun I'm having! So I'm including a small tutorial at the end of the post.

But, before we get to the instructions...here are some close-ups of the page...


I used some foam adhesive to give one of the flowers a little lift.


 Close up of the googlies. hee hee!


I also used the foam adhesive on the buttons to help them stand out a bit more.


Now to the fun part...

I started with two baby food jar lids,
two small plastic packages that some brads and embellishments came in,
Aleene's clear tacky glue,
two buttons,
paper


First, I cut out two pieces of paper to fit the inside of the lid and two pieces of the packaging for the outside of the lid. This is what will hold the button inside the lid so make sure it is a tad bit bigger than the diameter of the lid.


To assemble the eyes, just glue the paper to the inside of the lid,
set the button on the paper,
put a line of tacky glue around the lip of the lid (try not to let it drip into the lid because you might end up accidently gluing your lid to the jar).

Place the plastic circle onto the lid and let the glue dry.

To cover up the lid lip, I just went around the edge of the plastic circle with a black marker. Plus this helped give some definition to the eyes. If you want to cover up the sides of the lid, a small strip of ribbon works perfect!


Finish it up by adhering the eyes to the page with some regular sized glue dots and your googlies are ready for a good shakin'!


NightOwlCrafting